Step 1: Install Node.JS
URL: NodeJS DownloadStep 2: Install Expo CLI
npm install --global expo-cli Ref: https://expo.dev/toolsStep 3: Install Expo Client on Your Phone
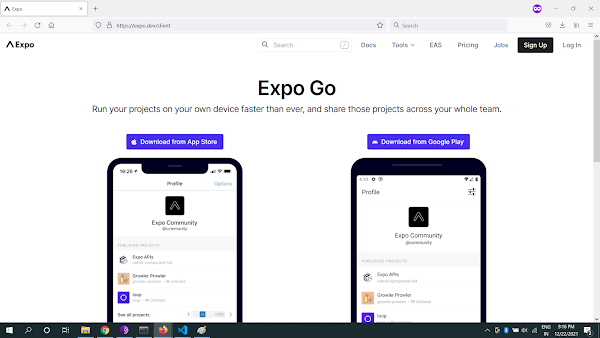
Ref: https://expo.dev/clientStep 4: Initialize a blank Expo project
(base) E:\Workspace\react_native>expo init msg_tracker √ Choose a template: » blank a minimal app as clean as an empty canvas √ Downloaded and extracted project files. 📦 Using npm to install packages. √ Installed JavaScript dependencies. ✅ Your project is ready! To run your project, navigate to the directory and run one of the following npm commands. - cd msg_tracker - npm start # you can open iOS, Android, or web from here, or run them directly with the commands below. - npm run android - npm run ios # requires an iOS device or macOS for access to an iOS simulator - npm run web (base) E:\Workspace\react_native> (base) E:\Workspace\react_native>cd msg_tracker (base) E:\Workspace\react_native\msg_tracker>dir Volume in drive E is New Volume Volume Serial Number is 5086-28BA Directory of E:\Workspace\react_native\msg_tracker 12/22/2021 07:13 PM <DIR> . 12/22/2021 07:13 PM <DIR> .. 12/22/2021 07:11 PM <DIR> .expo-shared 10/26/1985 01:45 PM 119 .gitignore 10/26/1985 01:45 PM 454 App.js 12/22/2021 07:11 PM 654 app.json 12/22/2021 07:11 PM <DIR> assets 10/26/1985 01:45 PM 107 babel.config.js 12/22/2021 07:12 PM <DIR> node_modules 12/22/2021 07:13 PM 665,238 package-lock.json 12/22/2021 07:11 PM 537 package.json 6 File(s) 667,109 bytes 5 Dir(s) 579,593,072,640 bytes free (base) E:\Workspace\react_native\msg_tracker>type App.js import { StatusBar } from 'expo-status-bar'; import { StyleSheet, Text, View } from 'react-native'; export default function App() { return ( <View style={styles.container}> <Text>Open up App.js to start working on your app!</Text> <StatusBar style="auto" /> </View> ); } const styles = StyleSheet.create({ container: { flex: 1, backgroundColor: '#fff', alignItems: 'center', justifyContent: 'center', }, });Step 5: Starting the application with "$ expo start"
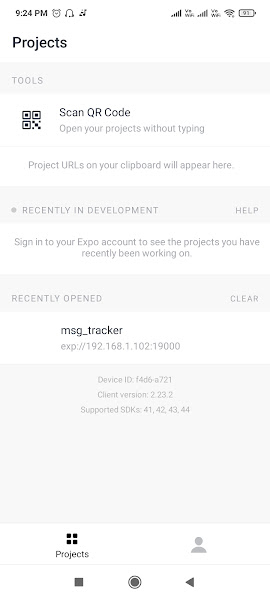
Before running "expo start", make sure that your Desktop and Phone are on same WiFi network, in my case it is Airtel-MyWiFi. (base) E:\Workspace\react_native\msg_tracker>expo start Starting project at E:\Workspace\react_native\msg_tracker Developer tools running on http://localhost:19002 Starting Metro Bundler ▄▄▄▄▄▄▄▄▄▄▄▄▄▄▄▄▄▄▄▄▄▄▄▄▄▄▄ █ ▄▄▄▄▄ █ ▀▀▄ ▄██ █ ▄▄▄▄▄ █ █ █ █ ███ ▄▄ ▄▄ █ █ █ █ █ █▄▄▄█ █ ▄▄ █ ██▄█ █▄▄▄█ █ █▄▄▄▄▄▄▄█ █ ▀ █▄▀ █▄▄▄▄▄▄▄█ █▄▄ ▀▀ ▄█ ██▀ ▀▄▄ ▄▄██ █ █ █ ▄█▄▀█▀█▄██▄▄██▀▄█▄▄█▄█ █▄█▄▀▀▄▄ ▀ █▄ █ █ ███▀ ▀█ █▄▄█▀██▄▀▄█ ▀ ▄ ▄█ ▄█▀▄█ █▄▄▄█▄▄▄█ ▀█▄▀ █ ▄▄▄ ▀█ █ █ ▄▄▄▄▄ █▀▄▄▄▄▄ █ █▄█ ██▀▄█ █ █ █ ██▀█ ██ ▄▄▄▄ ▀ ██ █ █▄▄▄█ █ ▄▄▄▄▄ ▀▀█ ▄██▄▄█ █▄▄▄▄▄▄▄█▄█▄▄██▄▄▄▄█▄▄███▄█ › Metro waiting on exp://192.168.1.102:19000 › Scan the QR code above with Expo Go (Android) or the Camera app (iOS) › Press a │ open Android › Press w │ open web › Press r │ reload app › Press m │ toggle menu › Press d │ show developer tools › shift+d │ toggle auto opening developer tools on startup (disabled) › Press ? │ show all commands Logs for your project will appear below. Press Ctrl+C to exit. Once you have scanned the QR code from phone, following logs will appear: Android Bundling complete 10901ms Android Running app on M2006C3LIApp Screenshots From Phone
Pages
- Index of Lessons in Technology
- Index of Book Summaries
- Index of Book Lists And Downloads
- Index For Job Interviews Preparation
- Index of "Algorithms: Design and Analysis"
- Python Course (Index)
- Data Analytics Course (Index)
- Index of Machine Learning
- Postings Index
- Index of BITS WILP Exam Papers and Content
- Lessons in Investing
- Index of Math Lessons
- Index of Management Lessons
- Book Requests
- Index of English Lessons
- Index of Medicines
- Index of Quizzes (Educational)
Wednesday, December 22, 2021
Getting Started With React Native
Subscribe to:
Post Comments (Atom)


No comments:
Post a Comment