Step 1: Install VirtualBox 6.0 or higher (by launching the .EXE file as administrator)
Step 2: Download the .ISO file for the latest "Ubuntu Desktop" (version used for this post: Ubuntu 18.04.2 LTS) from here "https://ubuntu.com/download/desktop"
Step 3: Install Ubuntu as shown below:
3.1. Create "New" VM in VirtualBox:

3.2.

3.3.

3.4.

3.5.

3.6. The size of virtual hard disk can vary upto 2TB depending upon space in your physical hard disk.

3.7. The .ISO image that we had downloaded earlier now comes into picture. You have place it in a directory that you can relate with the VM setup at a later point of time. Note that, this file should not be moved in future till you want to use this Ubuntu setup:

3.8. Now your VM setup is over, you start with the installation of the Guest OS 'Ubuntu':
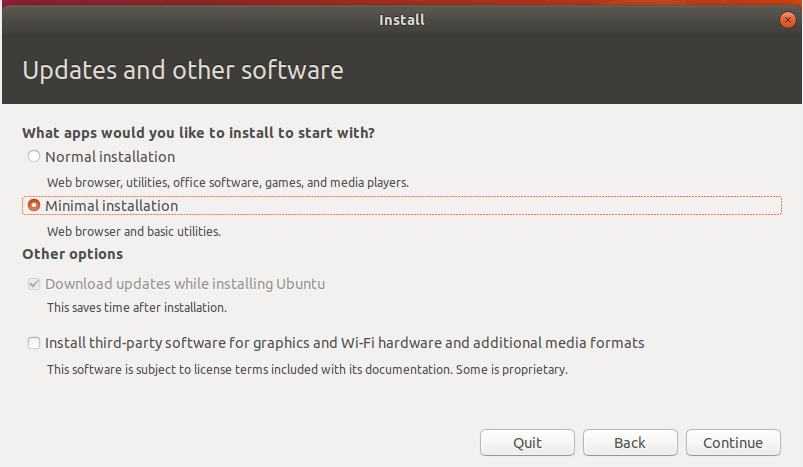
A: You can either do "Normal Installation or check the faster, lighter option 'B'."

B: The minimal installation...
3.9.

3.10. Restart the machine once Ubuntu shows the message to do so on completion of the installation.
Step 4: Start the Ubuntu and install "Guest Additions". It will warn that it will install new software on the system, "accept" it and let it run.

Step 5: This is what opens on clicking the "VBox_GAs_6.0.8" icon on Desktop:

Step 6: Then you have to fire the following commands in the 'Terminal' as follows:

Step 7: Open the 'Terminal' and fire the command "sudo apt-get install virtualbox-guest-additions-iso"
Step 8: Restart the Guest 'Ubuntu'.
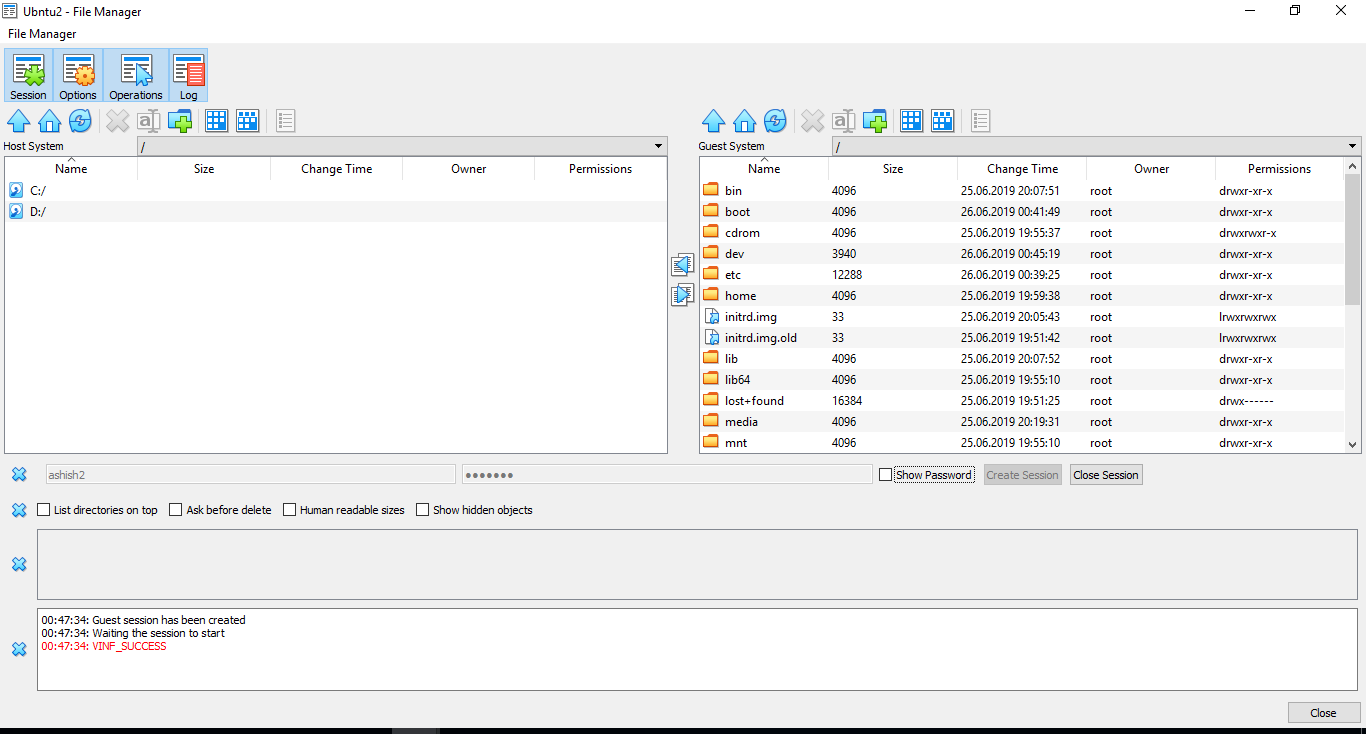
Step 9: Open the "File Manager".

Step 10: Enter the Guest Ubuntu OS credetials, and 'File Manager' is ready for use.
No comments:
Post a Comment